
What is a Graphite Burst Disk?
Graphite burst disk, or graphite rupture disk, is a type of pressure relief device that protects equipment and systems from overpressure situations. It is designed to rupture at a specific pressure threshold, allowing the release of excess pressure and preventing damage to the system.
How are Graphite Burst Disks are used for Environmental Test Chambers?
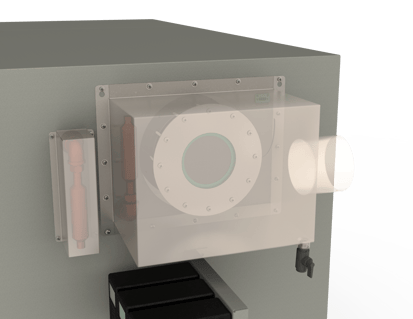
Graphite Burst disks are commonly used in environmental test chambers to prevent overpressurization from building inside the chamber. Graphite burst disks are engineered to rupture at a specific pressure threshold (this will be labeled on the disk). When internal pressure in the chamber exceeds the threshold, the burst disk will rupture, allowing excess pressure to be safely released out of the chamber.
In battery testing, cells will be tested at environmental conditions like temperature, humidity, and pressure. Graphite Burst Disks will be incorporated as a safety feature. Environmental Test Chambers equipped with a burst disk will provide a safe release of excessive pressure. This is achieved through a low-flow vent and burst disk, allowing the gasses to escape from the chamber.
When do you know it is time to replace your burst disk?
Refer to the information tag on your burst disk to see your PSI pressure rating; if your burst disk exceeds the pressure rating, your disk will burst and needs to be replaced.
How to replace your burst disk?
Before installing your new rupture disk, you must do the following:
- Inspect Flang. Clean the seating surfaces of both flanges before installing the rupture disk. Puts dirt or frit can damage the rupture disk or cause leakage.
- Inspect the rupture disk. Handle the rupture disk carefully- it is a precision instrument. Examine disk surfaces before installing.
Installing the Graphite Rupture Disk:
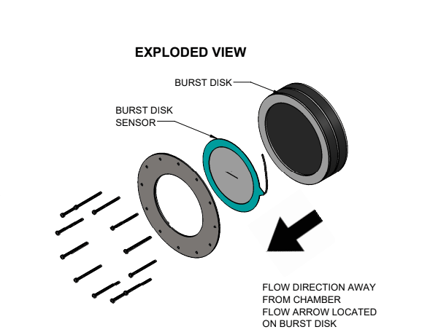
Step One: Anti-seize should be applied to the studs before installation
Step Two: Install studs in a crescent moon shape to support the rupture disk placement.
Step Three: Place rupture disk on the chamber
Step Four: Slide in the rupture disk sensor
WARNING: The sensor is delicate and can easily be damaged during installation. Handle with Caution.
Step Five: Tighten all studs hand tight before torquing.
Step Six: Torque Studs
IMPORTANT: Evenly torque the studs to 25 INCH-LBS.
- IMPORTANT: DO NOT OVER TORQUE. Uneven or excessive torquing may cause a premature burst.
Step Seven: Connect wires to chamber green plug. Blue wire goes to the left, and black wire to the right.